Tuesday, March 29, 2016

Tribal Altar


This is my final project for Mikey Rogers' texturing course at Gnomon. The scene is based on an env concept by U-brothers in China. I wanted to achieve a sense of realism and yet retain the fantasy feel in the design. Everything was modeled in Maya, with some objects detailed in Zbrush for displacement maps. Mari was used to paint all of the textures in the scene. No procedural methods were used since it is a texturing painting class. Cheers!


Zerg Queen Character Sculpture

I just finished another term at Gnomon. Time went by so quickly, especially in the sculpture class with John Brown. There is something strange about the physics of timespace within the sculpture lab...4hours felt like 30 minutes. Anyways, I want to share the fruit of my labor and present to you all Kerrigan's lost brood mother on one of the planets she left behind.


Wednesday, December 9, 2015

Gnomon Journey so far

Term 1 of my Digital Production Program at Gnomon School of VFX is officially coming to a close. I can't believe the amount of work we students put in in a mere 2 and a half month period. Everyone works their asses off for one reason only: we absolutely love what we do. This is why I am having the time of my life at Gnomon, and why I am so sad that time is passing by so quickly. 
Here is a quick update of the 2 final assignments for Photoshop for Production class with Stephen Mcclure, and Texturing and Shading 1 with Matt Rosenfeld. Both instructors provided us with an extraordinary amount of knowledge that I cannot thank enough for.

Photoshop for Digital Production Final Matte Painting Assignment
-The matte painting is made from a number of images. The mountain range is comprised of photo references provided for free by Noah Bradley (I love you). 


Texturing and Shading 1 Final Assignment
-Texturing and rendering a chosen object. I chose Mass Effect 3's armor. I re-sculpted the game model and re-organized the UV for high res texturing. That wasn't enough for me so I built a scifi scene around it so I can have an image that has a storytelling aspect rather than just rendered images of a single textured armor.


Sunday, October 18, 2015

World of Warcraft Harpy Inktober Drawing

Its only week 2 of my Gnomon journey. The workload is relatively moderate, but I already find myself working on something at any given hour of the day. It is very strange, because I am tired but I enjoy every minute since I am doing something I love 24/7.
Anyways, I squeezed in some sketching time while waiting for one of my assignments to render. This is the Harpy drawing from one of Blizzard's original creature concepts by Roman Kenny.


Wednesday, September 16, 2015

What a Day to Remember :D

I can't believe this! Official twitter for Heroes of the Storm @BlizzHeroes retweeted my post to them featuring the Zagara Sculpture! I am beyond happy and excited that they liked my work enough to feature it on their twitter page. Thank you so much :D


Thursday, September 3, 2015

Zagara Project WIP

This project is going to be my last major character project before starting school at Gnomon. The Desert Queen skin of Zagara in Heroes of the Storm is my favorite skin. There are many reasons why I think she is a great subject to do a sculpture on. One of them being that I have never done an HD sculpt just for the sake of sculpting. I have done a lot of sculpting in the past that were focused on being baked into a game mesh. For this last project, I want to go all out, and unchain myself from polycount limit and just have fun with sculpting.
I have a few goals I want to accomplish:

  1. produce a couple beauty render that are poster worthy
  2. High resolution sculpture that looks great far away and also in close ups
  3. Capture the character's emotion in the sculpture
  4. If time permits, texture the character and render with realistic shaders.


Here is the paint over of the skin. The skin is beautiful but there are a number of areas I don't really like, and also post some problems. One being the weird "hair extensions" clipped on the underside of the head dress. The 3 pieces of hair on each side looks really awkward and covers up parts of the model. The hair in the back looks great because it contributes to the silohuette of the character, but the clip on extensions gotta go. I also redesigned the center piece of the head dress because the decor was a bit too simple for a high resolution sculpt. The materials are also explaned in the paint over in case I can carry it into the shading process.


Friday, August 7, 2015

Naomi Campbell

Naomi Campbell 3D Portrait


The project stemmed from the desire to achieve a realistic look.
I have always been such a huge fan of Naomi, so it was not difficult to pick the subject for this project. Naomi Campbell has one of the most iconic look in the fashion industry, and I think doing a sculpt of her would be really fun.
The process is pretty straightforward. HD sculpt -> Bake maps -> Texturing painting -> Shading and Lighting in Maya. I am using Pixar Renderman for this because I am familiar with the workflow. I went into details such as using 4 maps to control the surface of the skin(oil, gloss and shine).


Friday, July 31, 2015

Barbarian

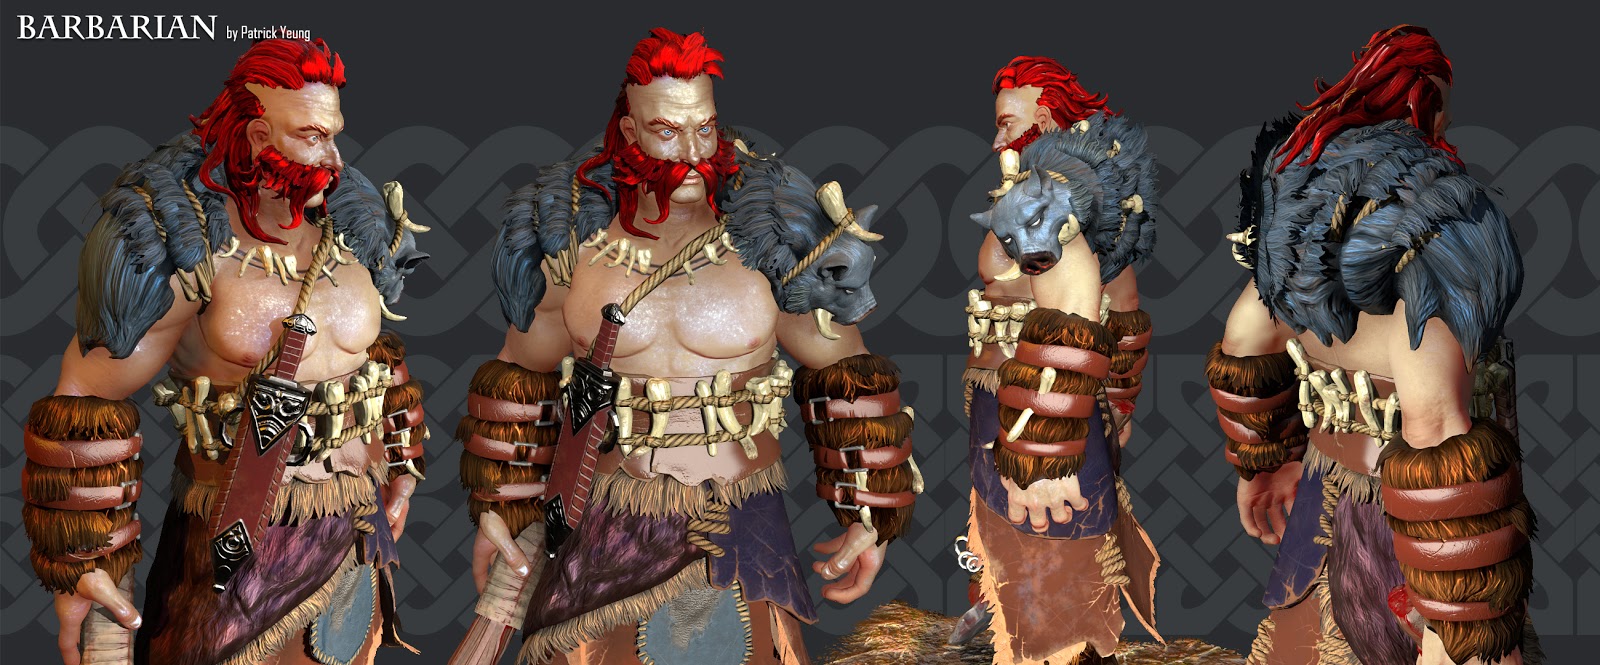
Barbarian Character project

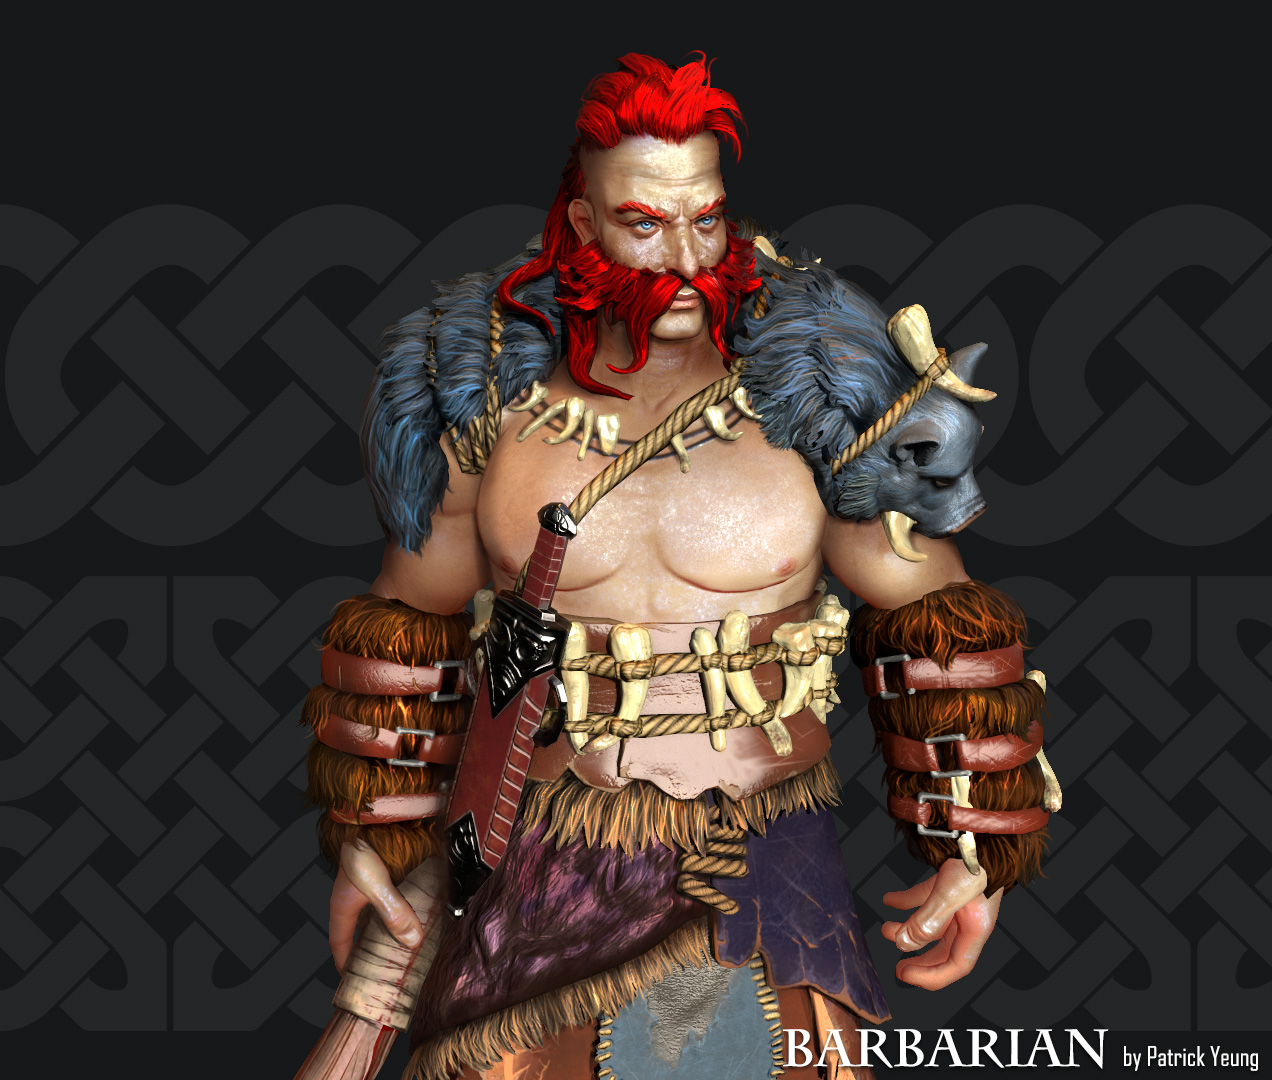
The day has come. I put in the final touches on the Barbarian character project this morning. Fixing and color correcting various texture maps. I am happy to share with people the final result! The entire process took about 3 weeks on and off. 


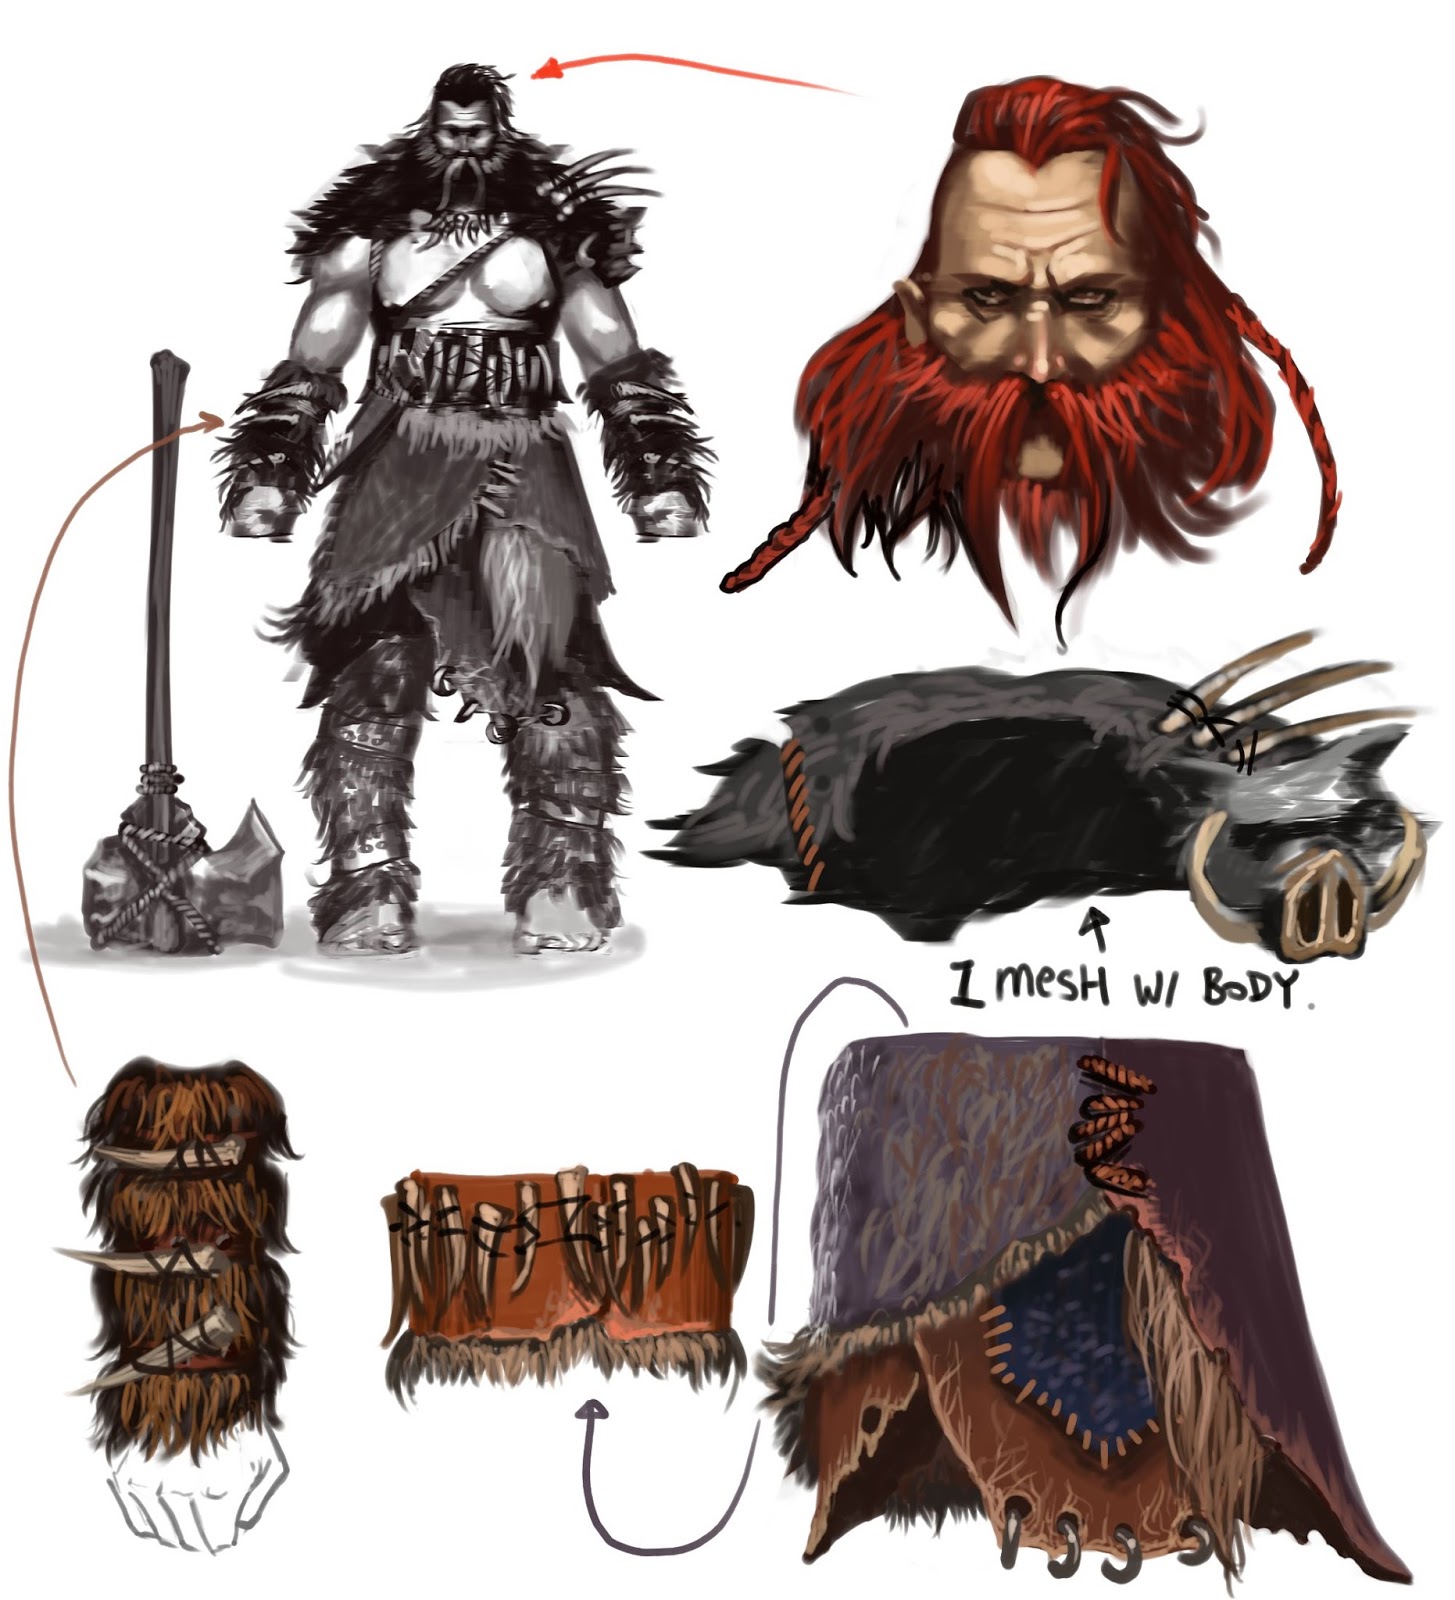
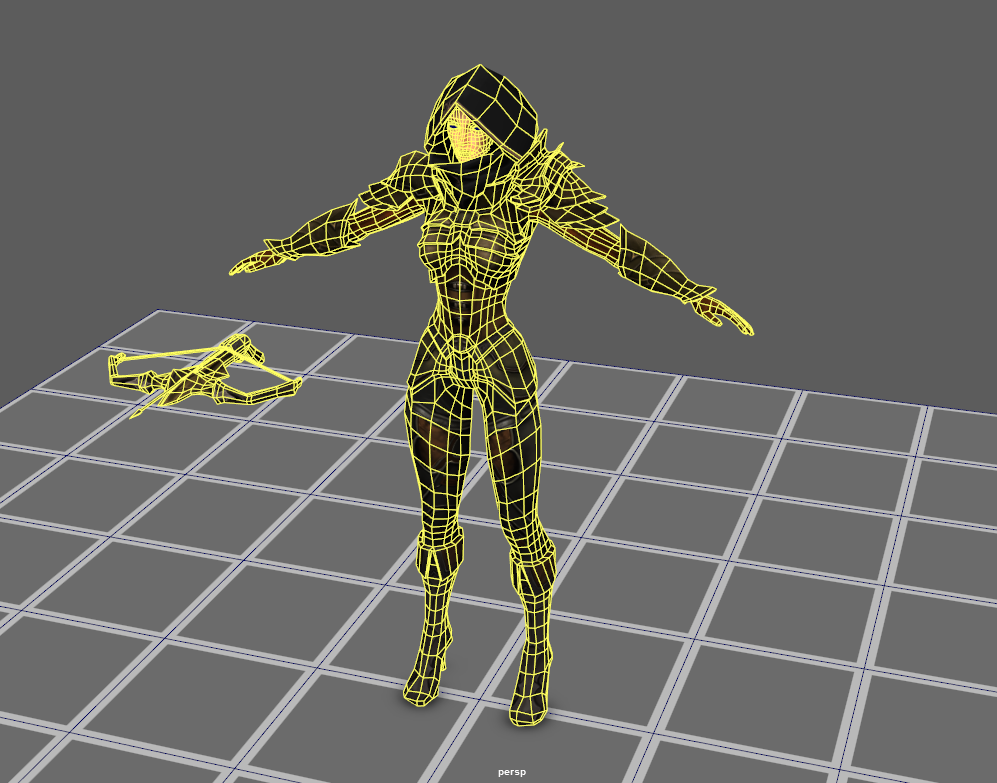
The project started with Caio's amazing concept painting of a bad ass barbarian warrior. I then dissected the painting and figured out how to address the different parts of the character so I don't overwhelm myself. There are parts that can be mirrored and duplicated. The bones are a good example. I modeled 6 bones with general diverse shape, then further detailed it in Zbrush. 

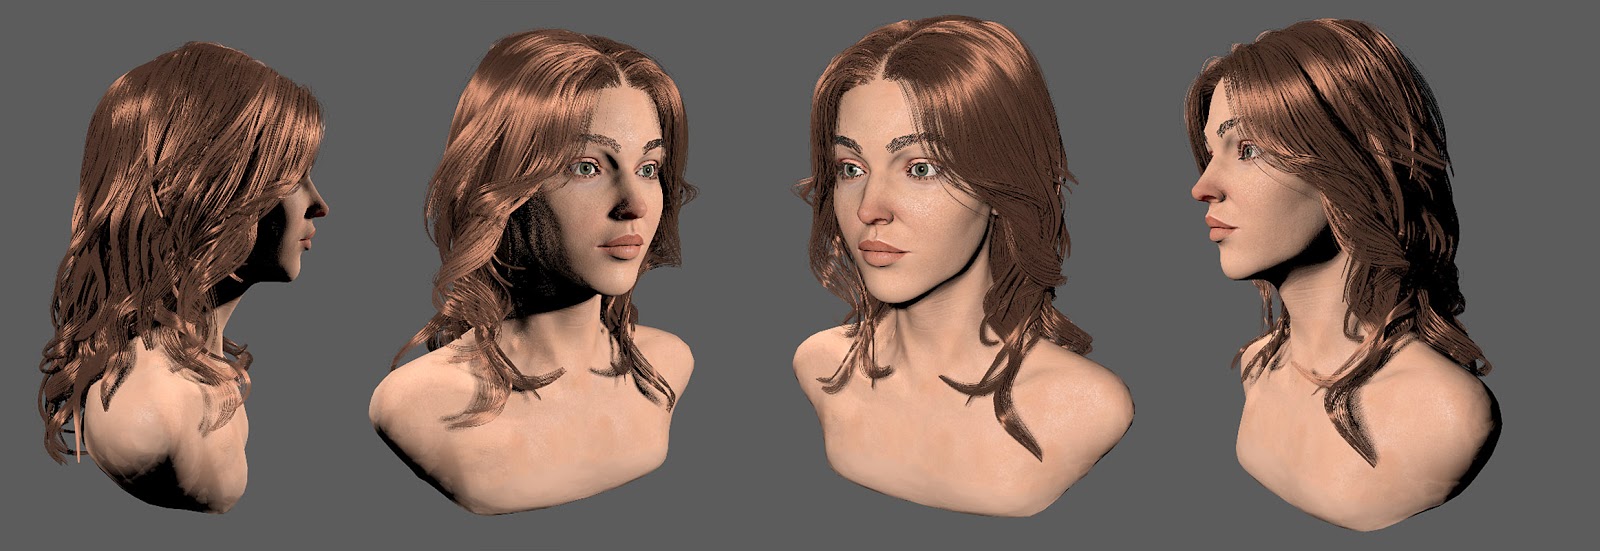
The hardest part of this project is to bring about the feeling of flowing fur in 3D. Hair and fur are never easy in the 3D world, especially for gaming. Before Nvidia hairworks, people usually rely on polygon planes with transparency(which is what I did for this character, but added normal map and flow map on top to simulate anistropic specularity.) and dynamic rigged meshes. 

I got through the whole project without any particular difficulty. With every attempt at something, I always want to learn something new or do something better. With this project, I feel that I learnt to go through the workflow quicker and ended with expected results, which is good for things that might take several iterations.

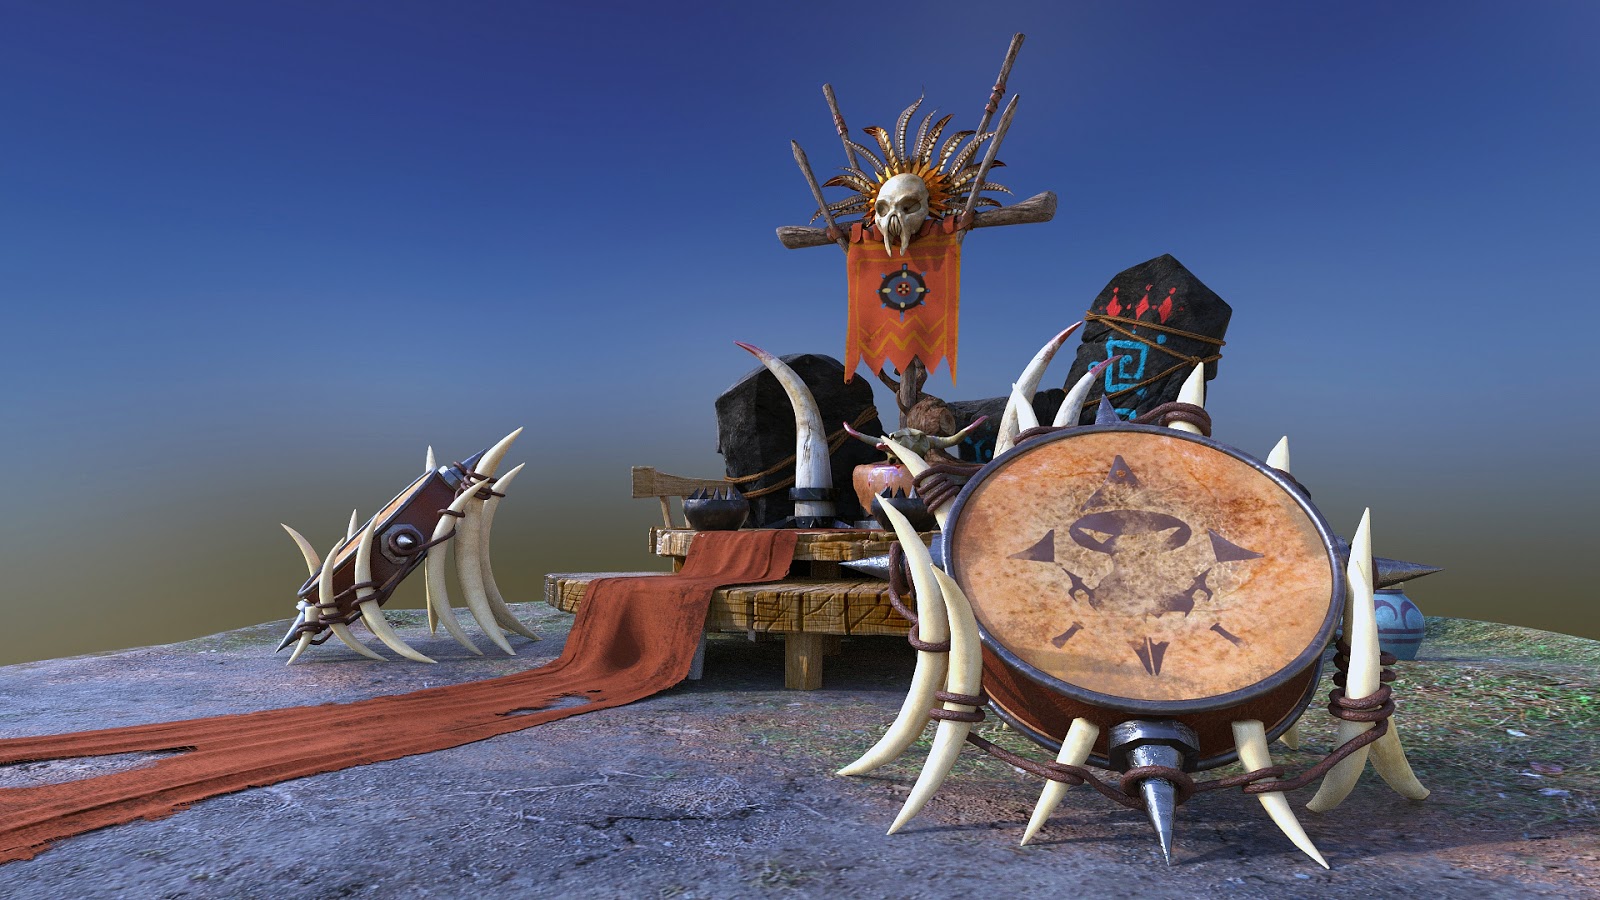
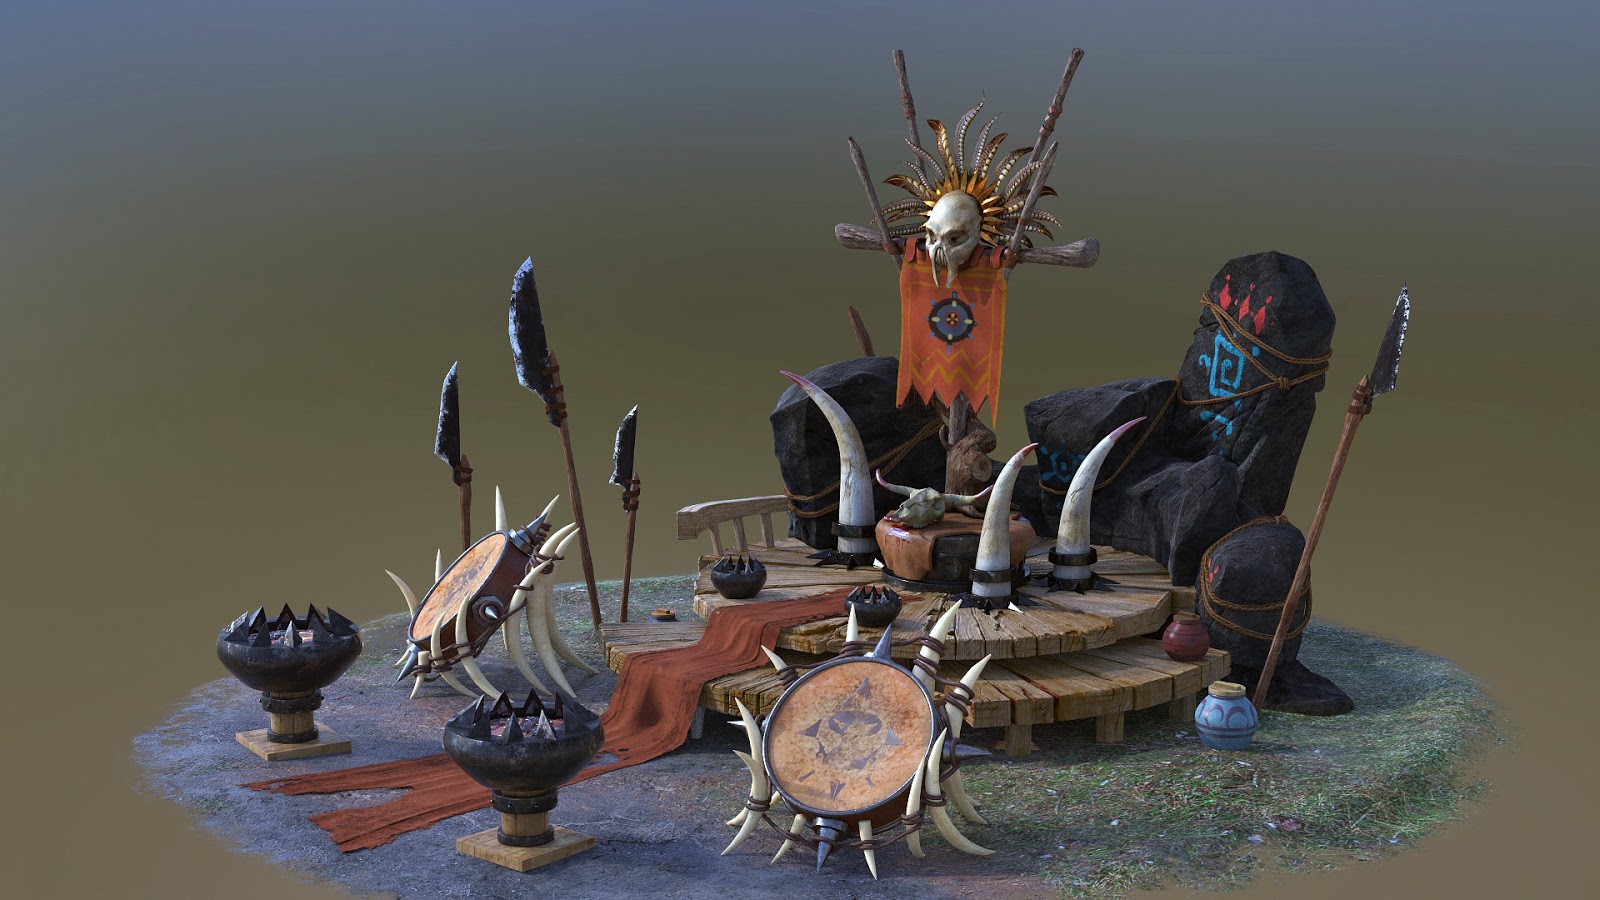
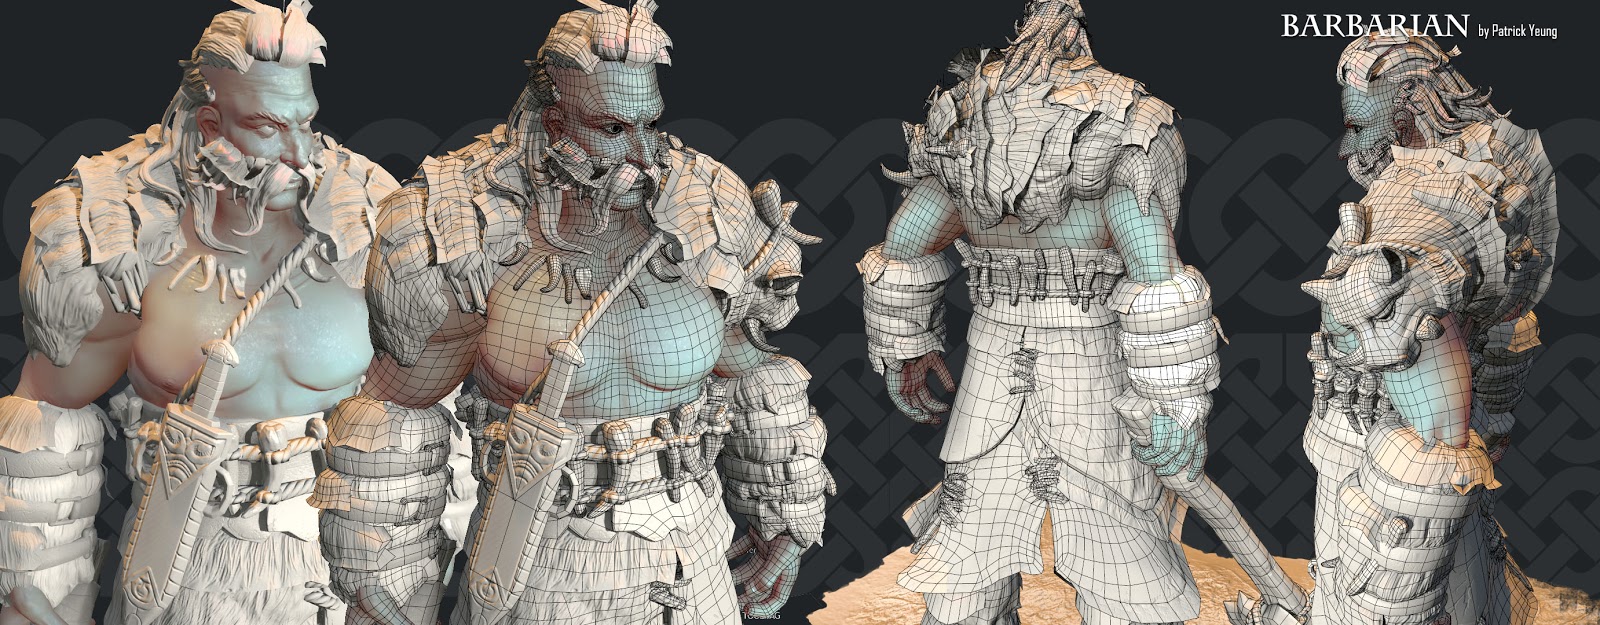
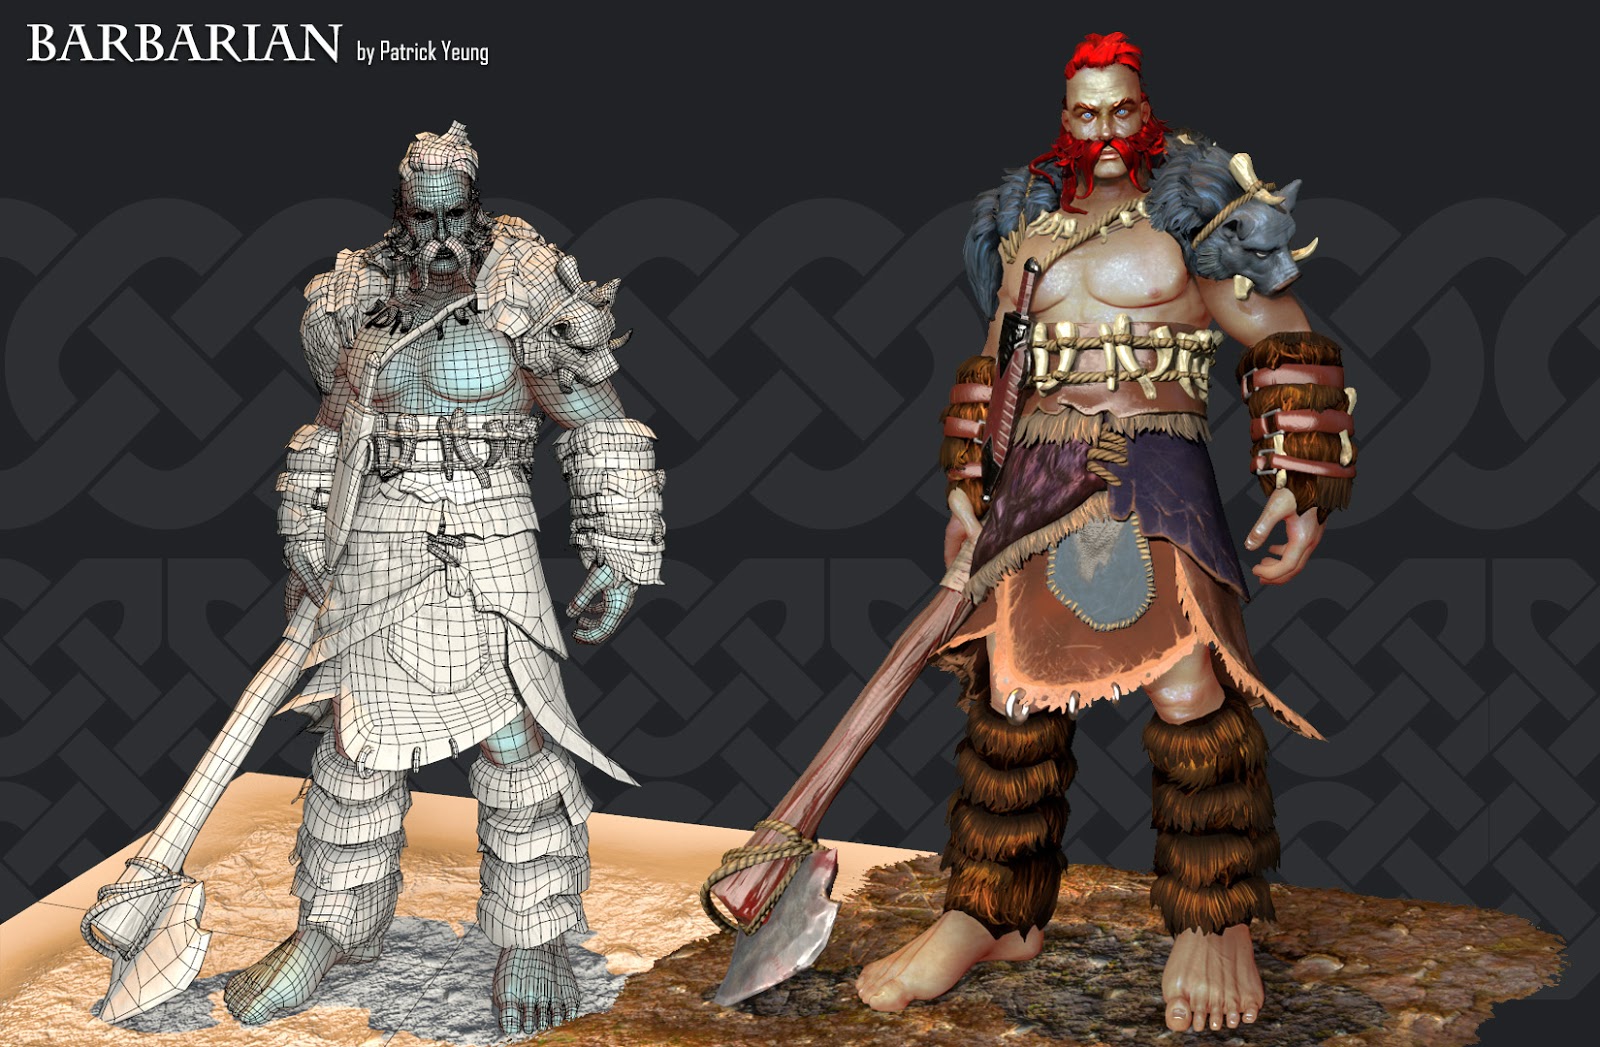
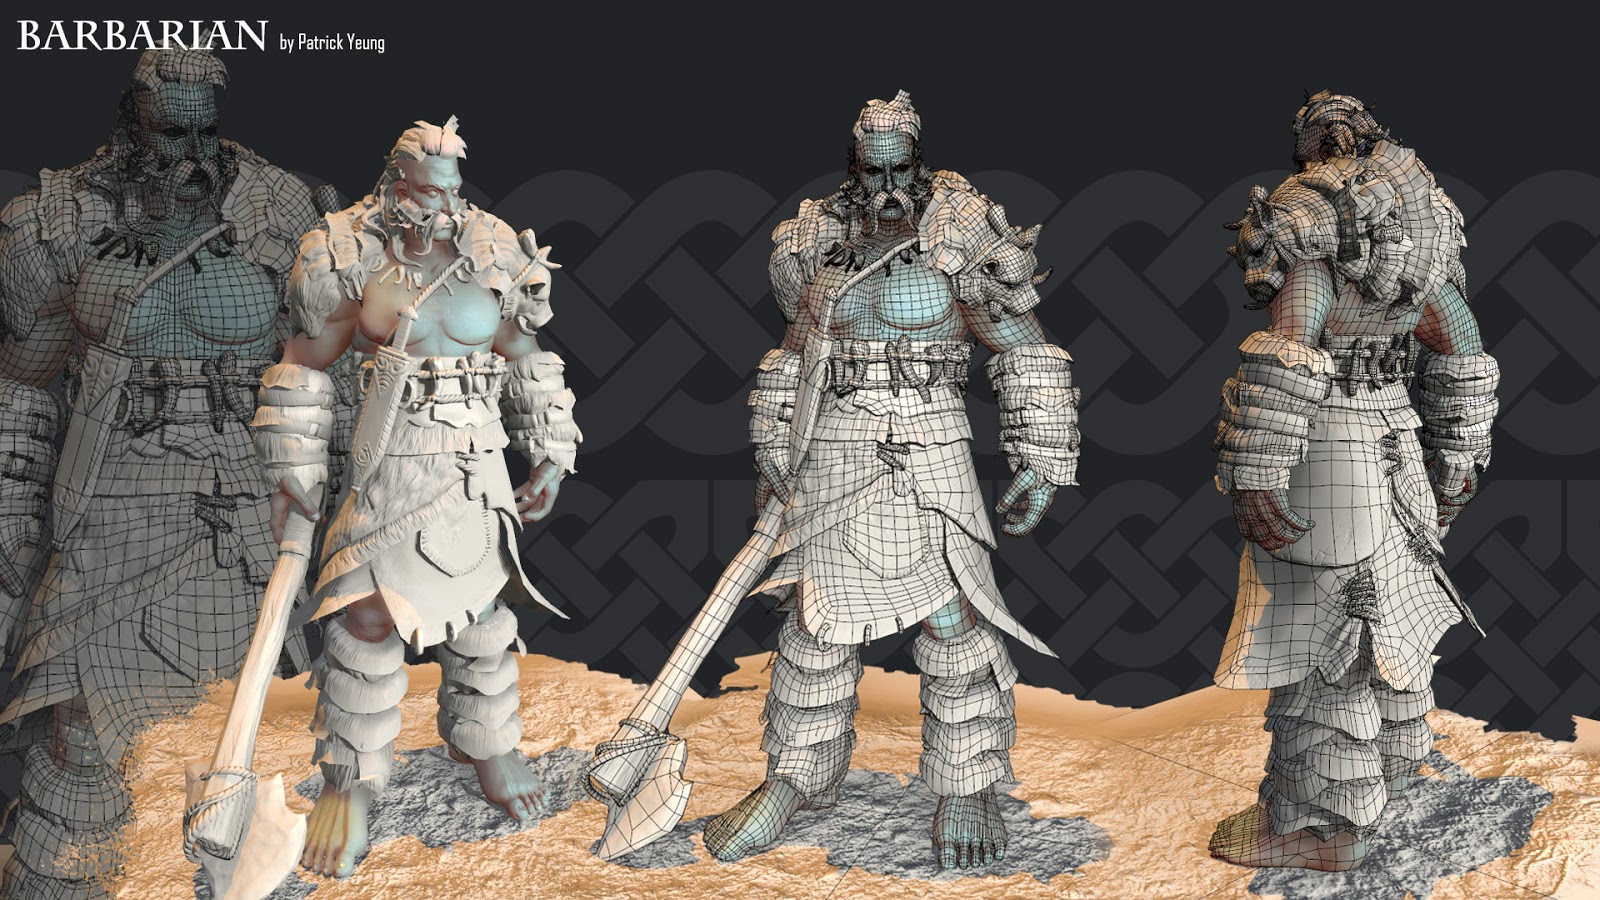
Here are some more images and sketchfab link:


Monday, July 20, 2015

Barbarian Project + updates

3D model paint over

I started a Barbarian project a couple weeks ago. The Barbarian is based on the following original concept by Caio, whos an amazing concept painter. 
Caio's original artwork
I broke down the design to plan for 3D sculpting and modeling, and here is the concept breakdown I painted to analyse the components.
Concept Breakdown
A quick update on the Barbarian project. I am currently at retop stage, which is a complete pain, but you got to get through it for painting textures. The sculpt is done, and the secondary details of the fur  will rely on texture maps. I definitely put in more work than is actually needed, but I do want the model to look good by itself. The painted fur textures, while very important for the read and overall look, cannot be the center stage of the character. I want him to be intimating. I don't want the audience's first thought to be "Such pretty fur!". Anyways here are the caps for the sculpt I am retoping on.


Monday, June 29, 2015

Awesome News :D

So this past weekend of the 27th I was flipping through ImagineFX issue 124, and guess what I saw? My submissions from a month ago! The editor had informed me that they would like to feature me, but I was never told in which issue. This is incredibly exciting for me, because I had been dealing with a lot of rejections lately from both job hunts and potential pitches. It may not seem like a huge deal having 2 full color pages featuring my work in a monthly magazine, but it is ImagineFX! It is an internationally acclaimed digital artist magazine that consistently delivers quality images and contents. Honestly, a much needed boost of morale and energy for me as I prepare for Gnomon in October, and the ongoing job hunt. I definitely feel validated, and that I am indeed producing work worthy of recognitions.
I am not sure if I posted an update on here about my acceptance into Gnomon School of VFX! So here it is. Ever since January of this year, I have been dedicating full time to enriching both my skills and portfolio in hopes of getting a job with a prestigious studios. The journey so far is difficult to say the least. The difficult part is keeping myself motivated and my energy level high in order to continually learn new things and improve my work while receiving rejection letters along the way from prospective employers. One thing is for sure. You have to keep going if you want something. Things won't happen if you don't give them the opportunities to happen.
My blog started out as a personal portfolio slash update site, and now I guess it turned into a record of my struggle to get into the industry. I hope that in the near future, I will have the opportunity to post an update that says "I've made it!".


Sunday, June 21, 2015

Xgen hair style

Recently bought Tarkan Sarim's xgen hair tutorial. So I couldn't wait to see how I can put it to good use on characters. All in a days work. I sculpted the female bust from scratch, baked necessary maps for a low res mesh. Painted the texture in Mari and started the hair creation process in Maya with Xgen. The eyebrows, eyelashes and hair are all made with xgen. Here are the screenies!


Addtoany